Site Scheduler is used when scheduling several menuboards that are displayed on different monitors that will share the same configurations, i.e., start and end times, recurrence, and priorities. If any menuboard differs in any Configure Existing Event window settings, it must be scheduled with a separate schedule.
Site Schedules Guidelines and Strategies
If you need to change the order of the players, that must be done in Network Management. See Editing a Network Account for more information. Once the order of the players is changed, you must then open the Player Assignment window and click Save Schedule again. See Assigning a Player to a Schedule.
Players cannot be added or deleted from a Site Schedule once it has been created. If a new player is being added, a new site schedule must be created.
Accessing the Site Schedule Management Page
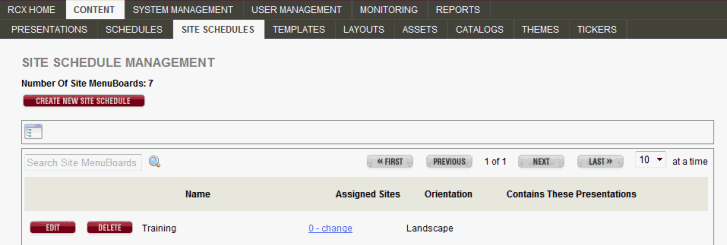
Click the Content/Site Schedules tab. The following window appears:

In this window, you can do the following:
■ Click Create New Site Schedule to create a new schedule.
■ Click Edit to change the site schedule.
■ Click Delete to permanently delete the site schedule. Deleting a site schedule that has Players assigned to it may cause the Players to stop playing content.
■ Click any column head to sort the site schedules in ascending or descending order by the information in the column.
For Example: To sort in ascending order by player name, click the Name column head. An up arrow appears next to the column head. If you click the column head again, a down arrow appears and the schedules are sorted in descending order by name.
Each tab under the Content
tab displays a Folder Navigator icon  providing
the opportunity to access the folders you have created in your RoninCast
system. See Using Folder Management
for information on creating new folders.
To use the Folder Navigator:
1. Click the Folder Navigator icon  . The
Root of the folders displays.

2. Click the arrow to expand the Root.
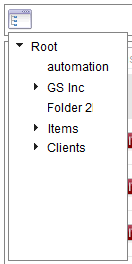
3. Select a folder. A drop-down list appears next to the Root drop-down box.

4. Click GO to open the list or to present another sub-folder drop-down list.
To create a new site schedule, do the following:
1. In the Content/Site Schedules tab, click Create New Site Schedule.
2. Select a destination folder from the Choose Folder for New Object window.
The following window appears:
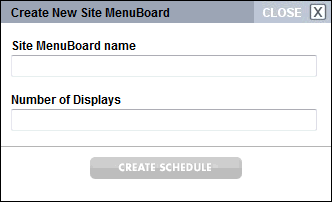
3. Enter the Site MenuBoard Name. See Schedule Naming Conventions for tips on proper naming conventions.
4. Enter the Number of Displays that will be associated with this schedule.
IMPORTANT: Once the site schedule is created, players cannot be added to or deleted from it. If adding or removing players is necessary, create a new site schedule and delete the old one.
5. Click Create Schedule.
The following window appears:
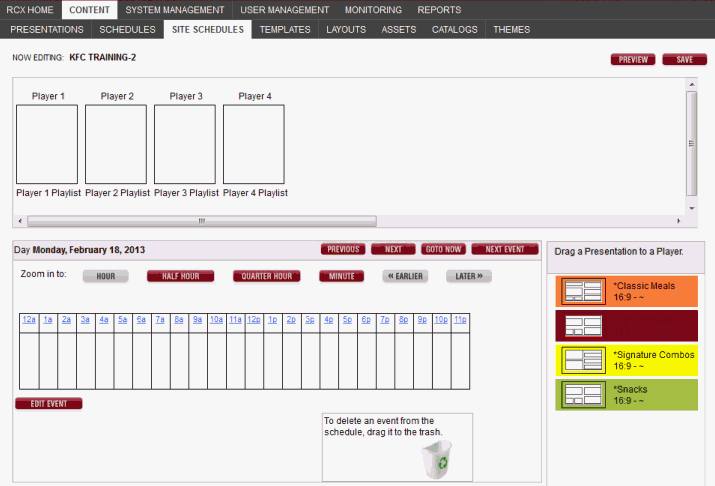
The presentations are listed on the right side. The colors are random to help differentiate one presentation from another when placed on the timeline. Use the Next, Previous, First, and Last buttons to navigate through the list of presentations or use the search field to locate a presentation.
Adding Presentations to the Site Schedule
Once the site schedule is created, the presentations are then added into the schedule to create "events."
NOTE: These presentations should be set in the order they appear in the store, left to right.
To add presentations to the site schedule:
1. Click the white box in the presentation and drag to Player 1 and drop.
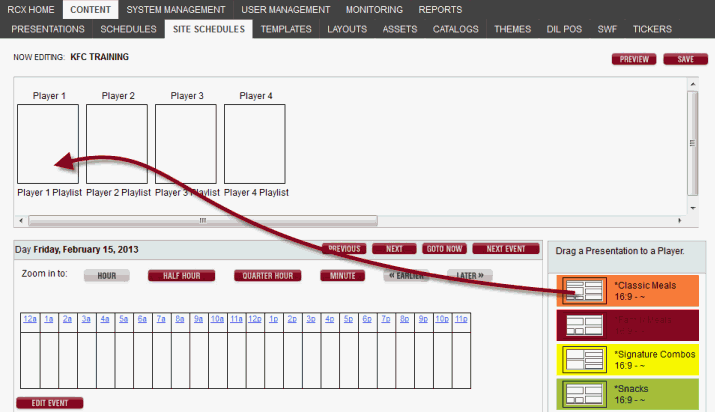
The following window appears:
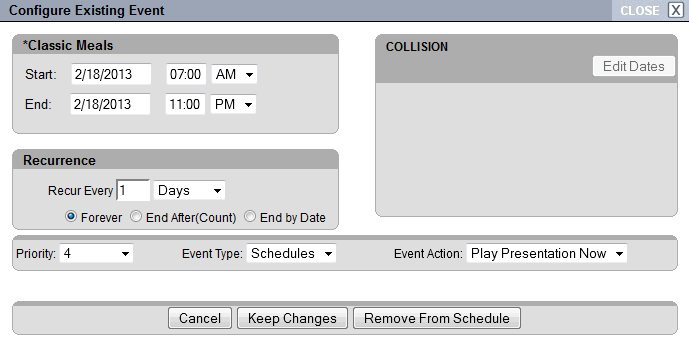
2. Enter the Start and End date and time. Click in the Start or End field to display a calendar.
3. Select the unit of time for Recurrence from the drop-down list to display the presentation(s) repeatedly over a period of time, if desired.
4. If you selected a Recurrence time unit, enter a value in the Recur Every field.
TIP:
There are different strategies for using the Recurrence
time units. Days and Weeks
are going to be the most common time units used. Selecting Day
and entering a "1" in the text box tells the schedule to play
the presentation every day. Enter a "2" tells it to play every
other day, and so on.
Weeks operate the same; entering
a "1" tells the schedule to play the presentations once a week
on the day that it was scheduled. For
example: If you schedule your presentation(s) on a Tuesday and
select Week and "1"
as the Recurrence, the presentations
will play once a week on Tuesdays.
5. If you enter a value for Recur Every, select a time frame for the recurrence (Forever, End After, and End by Date). Forever is the default setting.
■ Forever: Event continues to play until cancelled manually.
■ End After: Event plays after so many days or weeks, depending on the Recurrence setting.
■ End by Date: Click on the field to display a calendar. The date selected is the date the event will play.
NOTE: If there are no other events on this schedule, it will continue to play until cancelled.
6. Select Priority from the drop-down list.
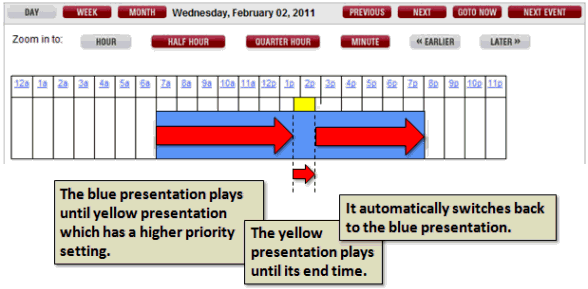
■ Multiple events assigned the same priority that overlap will rotate between events for the duration of the overlap. The duration is set on the Presentation Management page below the widgets. The default setting is 45 seconds.
■ Multiple events at different priorities will be overridden by the event with the highest priority (the lowest priority value)
TIP:
By always setting your regular events at a Priority
of 3 to 5,
you will have the flexibility of adding special events at a higher priority.
You can schedule a holiday presentation or a presentation with an emergency
message without cancelling the events on the schedule by leaving the default
Priority setting at 1.
The following illustration shows how the higher priority event would fit
in your regular schedule.
7. Select Event Type from the drop-down list. The options are Schedules or Hardware.
■ When Schedules is selected, the Event Action option is Play Presentation Now.
■ When Hardware is selected, the Event Action options are Turn Off Display or Turn On Display. The Event Action takes place according to the Start and End dates you set in step 6. Scheduling Hardware Events can also be done using the Add New Event button.
8. Click Add to Schedule.
The presentation is added to the timeline and is now referred to as an Event. You can edit the settings for this schedule. See Editing an Existing Site Schedule.

9. Click the white box in the next presentation and drag to Player 2 and drop.
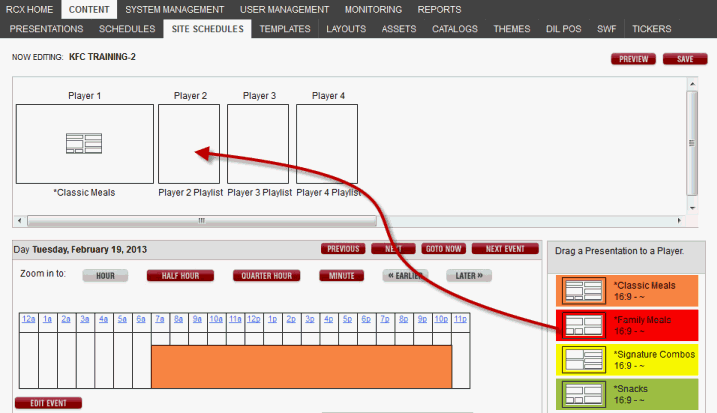
The following window appears:
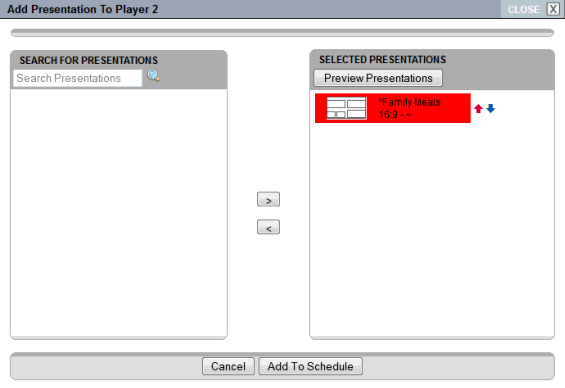
NOTE: To create a schedule playlist within this site schedule, see Creating a Schedule Playlist.
10. Click Add to Schedule.
11. Continue adding presentations to the site schedule until all players have events.
12. When the schedule is complete, click Save in the Schedule Editor window.

Assigning Players to Site Schedule
Use this procedure for assigning a players to a site schedule once it has been created.
IMPORTANT: Only sites with the exact number of players selected in the site schedule creation will appear in the Available Players list.
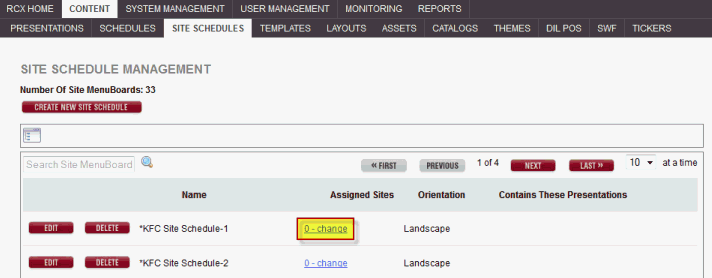
The schedules that have been created appear on the Site Schedule Management page, shown below. The Assigned Players column shows how many players have been assigned to each schedule and starts with a default of 0 players.
NOTE: To assign a schedule to a player, you must have created a site under Using Network Management.
To assign a schedule to a player:
1. Click the <x>-change link in the Assigned Players column for the schedule you want to assign.
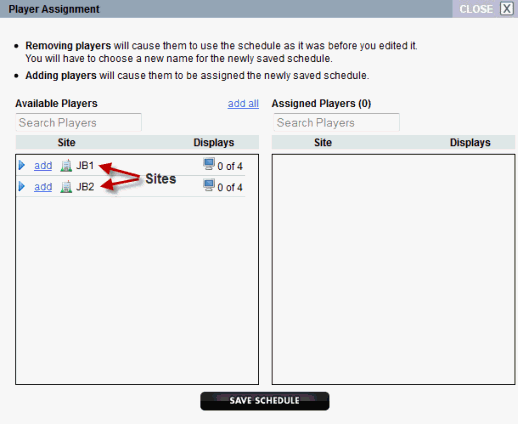
In the window below, the Available Players list shows the sites and players that have been added in Network Management. If the schedule is currently assigned to players, the players are listed under Assigned Players.
2. Click the arrow next to the site to reveal the individual players.
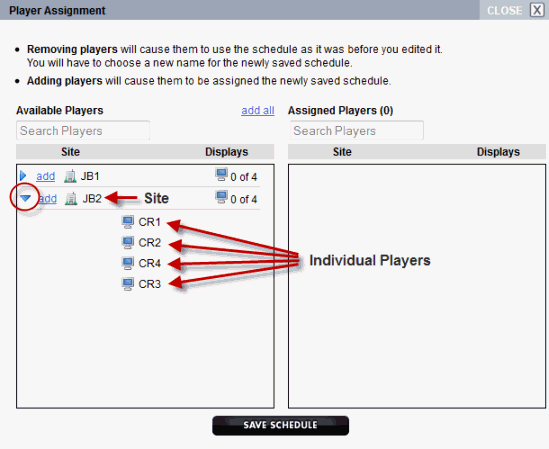
3. Click add next to the site containing the players to move it to the Assigned Players list.
4. Click Save Schedule. The schedule will be assigned to all players listed under Assigned Players and pushes that schedule out to the player to display the presentation.
Changing the Order of the Players
The order of the players cannot be changed in the site schedule, but needs to take place in Network Management.
To reorder the players:
1. Click the System Management/Network Management tabs.
2. Click Edit on the site in which the players need to be reordered.
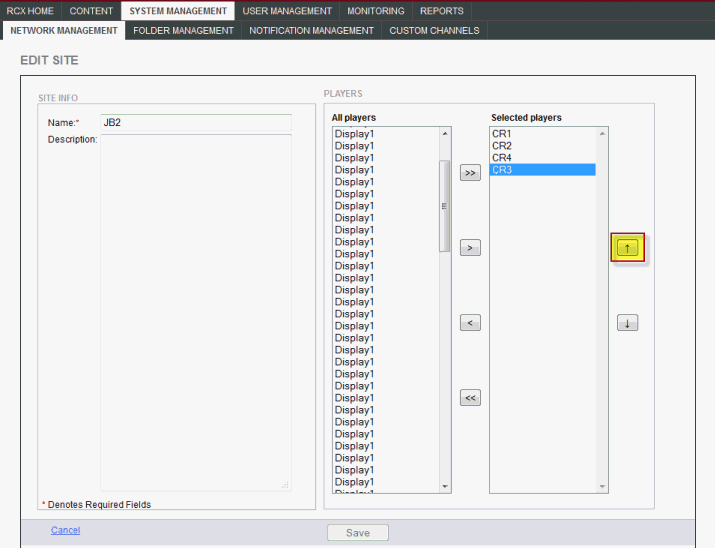
3. Select the player in the right column and move the Up or Down arrow.
4. Click Save.
5. In the Content/Site Schedules tab, reopen the site schedule where the players are assigned.
6. Click the <x>-change link and click Save Schedules.
IMPORTANT: This last step must be completed for the reordering of players to take effect.
Editing an Existing Site Schedule
You can make changes to an existing site schedule however, you cannot edit the number of players assigned to it.
To edit the settings in an existing site schedule:
1. In the Site Schedule Management window, click Edit next to the site schedule to open.
2. To edit the settings (start and end time, recurrence, and priority), click Edit Event.
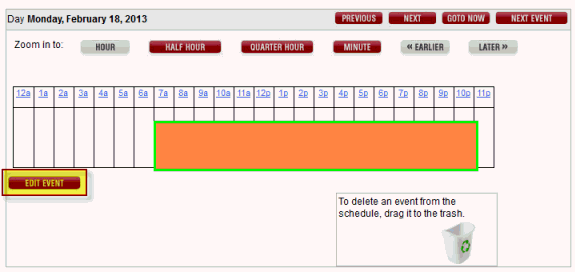
The Configure Existing Event window appears.

3. Make changes and click Keep Changes.
To swap presentations or edit schedule playlist:
1. To swap out the presentation in the schedule for another presentation, select the presentation within the Player box at the top.

The Add Presentation to Player 1 window appears:
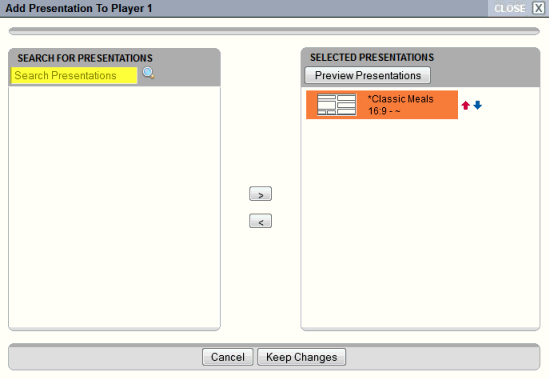
2. In the Search for Presentations search box enter in part or whole of the presentation.
3. Select the new presentation and click the right arrow > to move to the right panel.
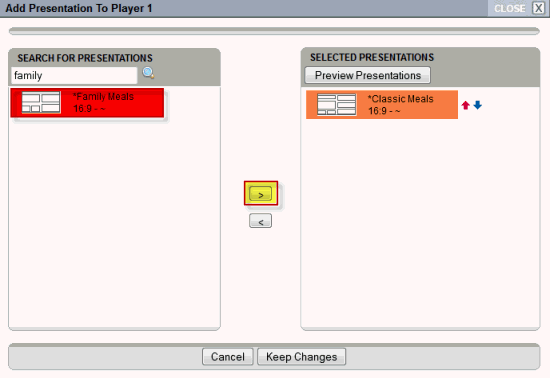
4. Select the old presentation on the right and click the left arrow < to move to the left panel.
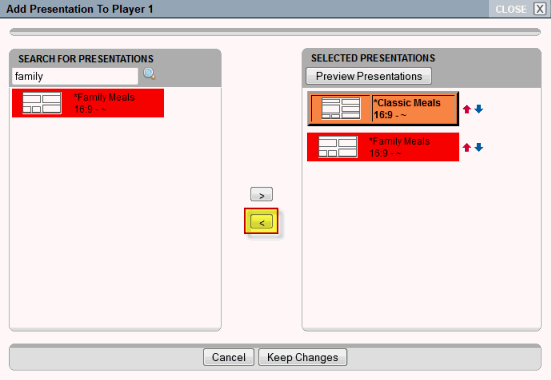
5. Click Keep Changes.
6. Click Save.
You can delete a site schedule from your system. To delete a site schedule, do the following:
1. In the Site Schedule Management window, click Delete next to the site schedule.
IMPORTANT: This Site Schedule may be assigned to multiple sites.
2. Click Yes to the Delete Site Schedule confirmation notice. Click No to cancel.