Presentations do not run until they are scheduled and assigned to players.
See Schedule Strategies and Guidelines
See Creating a Schedule Playlist
See Assigning a Player to a Schedule
See Editing an Existing Schedule
See Saving a Schedule as a New Schedule
See Discarding Changes to a Schedule
See Removing an Event from a Schedule
See Creating a Black Screen for Off-Hours
![]()
|
Tutorial: Creating and Updating Schedules |
Schedule Strategies and Guidelines
■ A separate schedule must be created for each player playing different content.
■ One schedule can contain several presentations for different parts of the day, different presentations for each day of the week and month, and/or emergency or holiday presentations.
■ A presentation placed in a schedule is called an Event. One schedule can contain several events.
Click the Content/Schedules tab. The following window appears:
In this window, you can do the following:
■ Click Create New Schedule to create a new schedule.
■ Click Copy to copy the schedule and save it under a new name.
■ Click Edit to change the schedule.
■ Click Delete to permanently delete the schedule. Deleting a schedule that has Players assigned to it may cause the Players to stop playing content.
■ Click any column head to sort the schedules in ascending or descending order by the information in the column.
For Example: To sort in ascending order by player name, click the Name column head. An up arrow appears next to the column head. If you click the column head again, a down arrow appears and the schedules are sorted in descending order by name.
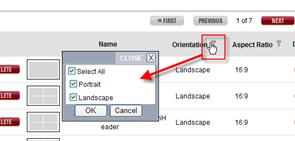
■ Click
a Filter icon ![]() to
open a list of options in that list to select or deselect and filter down
the list.
to
open a list of options in that list to select or deselect and filter down
the list.
Each tab under the Content
tab displays a Folder Navigator icon  providing
the opportunity to access the folders you have created in your RoninCast
system. See Using Folder Management
for information on creating new folders.
providing
the opportunity to access the folders you have created in your RoninCast
system. See Using Folder Management
for information on creating new folders.
To use the Folder Navigator:
1. Click the Folder Navigator icon . The
Root of the folders displays.

2. Click the arrow to expand the Root.
3. Select a folder. A drop-down list appears next to the Root drop-down box.

4. Click GO to open the list or to present another sub-folder drop-down list.
Use the Create New Schedule in the Contents/Schedules tab to create a new schedule. See the Naming Convention Best Practices for recommendations on naming schedules.
|
Naming Convention Best Practices (Click to open) |
To create a new schedule, do the following:
1. In the Schedule Management window, click Create New Schedule.
The following window appears:
2. Select a folder in which to place the new schedule. The following window appears:
NOTE: For more information about Folder Management and creating new folders, go to Using Folder Management.
IMPORTANT: If a folder is not present under the Root, a folder will need to be created under Folder Management before an object can be created.
3. Enter the Schedule Name. See Naming Convention Best Practices for recommendations.
4. Click Create Schedule.
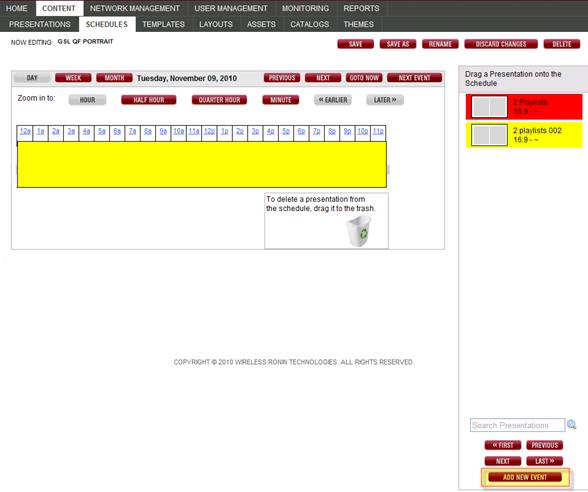
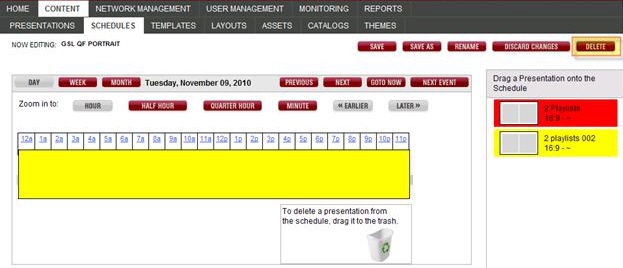
The following window appears.
The presentations are listed on the right. To find the correct presentation,
enter the presentation name in the Search
Presentations field located below the presentations or first few
characters and click the Search icon  , or use the
navigation keys near the Add New Event
button.
, or use the
navigation keys near the Add New Event
button.
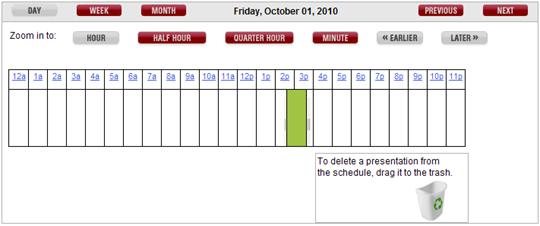
5. Drag a presentation icon onto the timeline to create an Event.
■ Click Hour, Half-Hour, Quarter-Hour, and Minute to show the schedule in different increments.
■ Click Earlier or Later to move the timeline to an earlier or later time, if it does not appear on the window.
■ The example above shows the Week view. See Month View.
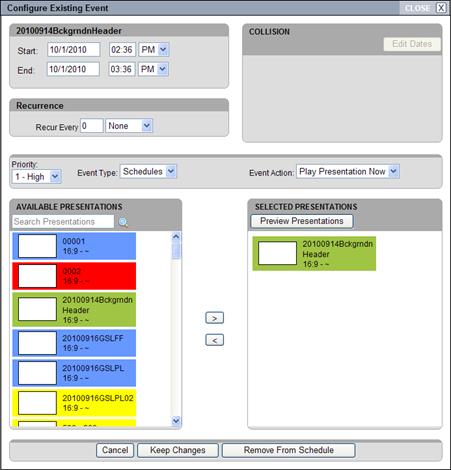
The Add Presentation To Schedule window appears:
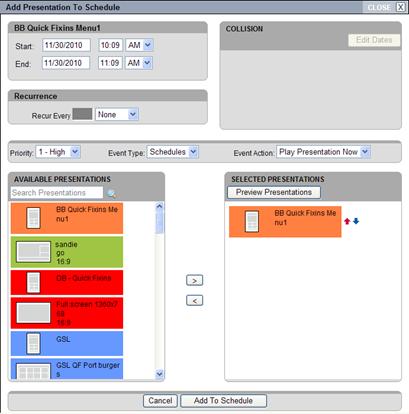
6. Enter the Start and End date and time. Click in the Start or End field to display a calendar.
7. Select the unit of time for Recurrence from the drop-down list to display the presentation(s) repeatedly over a period of time, if desired.
8. If you selected a Recurrence time unit, enter a value in the Recur Every field.
TIP:
There are different strategies for using the Recurrence
time units. Days and Weeks
are going to be the most common time units used. Selecting Day
and entering a "1" in the text box tells the schedule to play
the presentation every day. Enter a "2" tells it to play every
other day, and so on.
Weeks operate the same; entering
a "1" tells the schedule to play the presentations once a week
on the day that it was scheduled. For
example: If you schedule your presentation(s) on a Tuesday and
select Week and "1"
as the Recurrence, the presentations
will play once a week on Tuesdays.
9. If you enter a value for Recur Every, select a time frame for the recurrence (Forever, End After, and End by Date). Forever is the default setting.
■ Forever: Event continues to play until cancelled manually.
■ End After: Event plays after so many days or weeks, depending on the Recurrence setting.
■ End by Date: Click on the field to display a calendar. The date selected is the date the event will play.
NOTE: If there are no other events on this schedule, it will continue to play until cancelled.
10. Select Priority from the drop-down list.
■ Multiple events assigned the same priority that overlap will rotate between events for the duration of the overlap. The duration is set on the Presentation Management page below the widgets. The default setting is 45 seconds.
■ Multiple events at different priorities will be overridden by the event with the highest priority (the lowest priority value)
TIP:
By always setting your regular events at a Priority
of 3 to 5,
you will have the flexibility of adding special events at a higher priority.
You can schedule a holiday presentation or a presentation with an emergency
message without cancelling the events on the schedule by leaving the default
Priority setting at 1.
The following illustration shows how the higher priority event would fit
in your regular schedule.
11. Select Event Type from the drop-down list. The options are Schedules or Hardware.
■ When Schedules is selected, the Event Action option is Play Presentation Now.
■ When Hardware is selected, the Event Action options are Turn Off Display or Turn On Display. The Event Action takes place according to the Start and End dates you set in step 6. Scheduling Hardware Events can also be done using the Add New Event button.
12. Select Presentation(s) from the Available Presentations list and click the right > button to move to the Selected Presentations list.
NOTE: If there is more than one presentation in the Selected Presentations list, the order can be changed by clicking the down and up arrows.
13. Click Add to Schedule.
The presentation is added to the timeline and is now referred to as an Event. You can edit the settings for this schedule. See Editing an Existing Schedule.

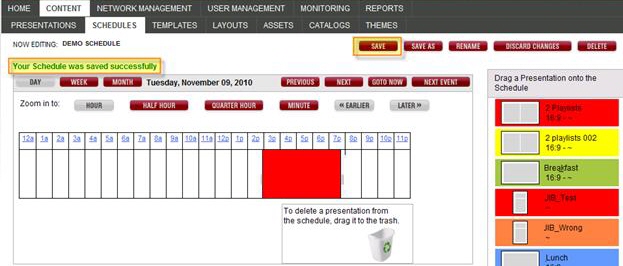
15. When the schedule is complete, click Save in the Schedule Editor window.
Week View enables you to view any recurrence settings made on specific events. If you change a schedule in this window, you can save it, save it as a new schedule, rename it, or discard your changes, as you can do in Day or Month view.
Month view enables you to view daily and weekly schedules from a bird's-eye view. This can be used for troubleshooting problems with a schedule.
For example: An old presentation may have been scheduled way back and is causing problems. In the Month view, you can navigate back through the previous months and look for a colored square that doesn't belong. Once you locate that square, note the month and day, go back into Week view, and then navigate back to that day and fix or remove the problematic presentation (event) from the schedule.
Add New Event Button
The Add New Event button enables you to add a Presentation to the schedule or schedule a hardware event, such as turning off or on the display. This mimics the dragging and dropping functionality but presents an Add Presentation To Schedule dialog box with no information selected by default.
TIP: Use the Add New Event button to schedule a hardware event more efficiently.
To rotate between two or more presentations in the same schedule, create a playlist within the Configure Existing Event window. Each presentation in the playlist can have different durations which is set on the Presentation Editor page.
To create a playlist within a schedule:
Within the schedule, open the Configure Existing Event window by double clicking the event (colored bar on the timeline).
In the Search for Presentations panel, enter part or all of the name of second presentation in the Search Presentations field.
Select the presentation for the search results by clicking once. Click the > arrow to move presentation to the Selected Presentations panel.
If adding more than two presentations, repeat the last two steps until all desired presentations for playlist are in the Selected Presentations panel.
Use the up and down red and blue arrows to change the order of presentations, if desired. Then click Keep Changes.
To change the duration each presentation plays before rotating to the next presentation (default setting is 45 seconds):
Click the Presentations tab and locate, then open the presentation in which to change the duration.
In the area below the presentation widgets, change the time in the Duration field.

Click Save in the presentation.
Repeat same process for other presentations in the schedule playlist, if desired.
Assigning
a Player to a Schedule
Use this procedure for assigning a schedule to a player once it has been created.
The schedules that have been created appear on the Schedule Management page, shown below. The Assigned Players column shows how many players have been assigned to each schedule and starts with a default of 0 players.
NOTE: To assign a schedule to a player, you must have created a site under Using Network Management.
To assign a schedule to a player:
1. Click the <x>-change link in the Assigned Players column for the schedule you want to assign.
In the window below, the Available Players list shows the sites and players that have been added in Network Management. If the schedule is currently assigned to players, the players are listed under Assigned Players.

2. Click the arrow next to the site to reveal the individual players.
IMPORTANT: Do not click add next to site unless it is your intention to assign all of the individual players in that site to this schedule!
3. Click add next to a specific player to move it to the Assigned Players list.
NOTE: To remove players from the Assigned Players list, click the remove link for a site or a specific player to move to the Available Players list. A Name of a new schedule is required if you remove an Assigned Player. It is required to have at least one schedule assigned to the player before clicking Save Schedule.
4. Click Save Schedule. The schedule will be assigned to all players listed under Assigned Players and pushes that schedule out to the player to display the presentation.
You can add an presentation to a schedule where it becomes an event or move existing events around within the schedule timeline. You also can remove an event from a schedule.
1. Select Edit to edit an existing schedule.
The system processes the access rules and dependencies.
It checks if your access settings include viewing, updating, or deleting the selected schedule. If you are not permitted to open this schedule, a message will appear stating such and the schedule will not open.
It also checks where this schedule is currently being used. If it is being used the following window appears with the Players tab:
The tab will list all of the items that would be affected if the schedule was edited in any way.
If you are sure that this schedule can be viewed and/or edited, click Yes and the timeline with the current schedule settings appears:
2. Edit the schedule by double-clicking an event on the timeline. The following dialog box appears to enable you to edit the event.
3. Click Keep Changes to save your changes, Cancel to discard your changes, or Remove From Schedule, which removes the event from the schedule.
NOTES:
■ If the schedule view is larger than will fit on the window, the Earlier and/or Later links become active so the schedule’s view can be adjusted.
■ Remove an event from a schedule by dragging it to the trash or editing the event and clicking Remove From Schedule.
In the Schedule Editor window, click the Save link to save the schedule. A message appears to confirm that the schedule was saved successfully.
Saving a Schedule as a New Schedule
To copy a schedule and give it a different name:
1. In the Schedule Editor window, click Edit next to the desired schedule.
2. Click Save As to save the schedule as a new schedule.
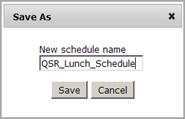
The following dialog appears:
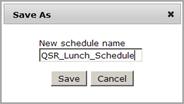
NOTE: The Save As name defaults to the current name, with an incremental number at the end.
3. Enter a name for the new schedule.
4. Click Save to save the new schedule. A confirmation message tells you that the schedule was saved successfully.
To rename an existing schedule:
1. In the Schedule Editor window, click Edit next to the desired schedule.
2. Click Rename to rename a schedule.
The following dialog box appears:
NOTE: The Rename field defaults to the current name, with an incremental number at the end.
3. Enter a new name for the schedule.
4. Click Rename to save the new name.
5. Close the schedule by clicking the Schedules tab without saving the schedule.
Discarding Changes to a Schedule
To revert your schedule back to its last saved state, use the Discard Changes feature. Any changes made since the last time Save was clicked will be deleted.
To discard the changes:
1. In the Schedule Editor window, click Discard Changes to discard changes made to the schedule since the last Save.
The following dialog box appears:
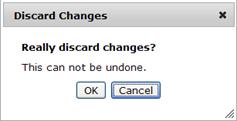
2. Click OK to delete the changes.
You can delete a schedule from either of the following:
The Schedule Management Window
The Schedule Editor
To delete the schedule:
1. Click the Delete link to delete the schedule.
NOTE: This will delete the schedule permanently and may leave players with no content to play.
2. Click OK to delete the schedule.
Removing an Event from the Schedule
There are two methods for removing an event (presentation) from the schedule.
To delete an Event from the schedule:
1. Click and drag the event on the schedule to the trash can. A confirmation message appears.
2. Click OK to delete the schedule. A Remove Event window appears.
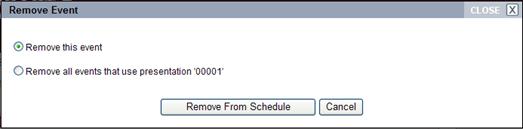
3. Select the desired option and click Remove From Schedule.
NOTE: The Remove Event message gives the option to remove the event from just the current schedule or from all of the schedules it appears in.
Schedules can be copied and given a new name from the Schedule Management page.
To copy a schedule:
1. Click the Schedules tab so that the Schedule Management page appears.
2. Click Copy next to the schedule.
The following window appears:
3. Select a folder in which to place the new presentation.
4. Enter a new name in the Copy Schedule window.
5. Click Create Schedule.
Creating and Scheduling a Black Screen for Off-Hours
When a presentation is dragged and dropped onto the timeline it becomes an event.
Events play until another event is scheduled. In the illustration below, Event 1 will continue playing until Event 2 starts at 4:45pm even though Event 1 was scheduled to end at 1:20pm. Event 2 will continue playing until Event 1 starts the next morning at 6:30am even though it is scheduled to end at 8:45pm.
To prevent events from playing past the scheduled time, a presentation with a black screen is created and added to the schedule.
In the illustration below, a black screen presentation is added to the timeline and set to play 24/7 at a low priority. The black screen will play during the times that there are no other events. When it encounters Event 1 at 6:30am, the software recognizes that Event 1 is set at a higher priority and will flip to that event. As soon as it is 1:20pm, the display will flip back automatically to the black screen. At 4:45pm, the display automatically flips to Event 2 which is set at a higher priority. Then it flips back to the black screen at 8:45pm.
Creating a black screen is very simple and only takes a few moments.
To create a black screen:
Using almost any program like Microsoft Word, Microsoft PowerPoint, or Paint, create a rectangle, either portrait or landscape and set the outline and the fill to black.
Depending on the program, either right-click the rectangle and select Save As Picture or select Save As from the File menu.
Save it in .jpg, .jpeg, or .png format.
Upload image into RoninCast in the Assets tab. See Adding a New Asset for more information.
Click the Presentations tab and click Create New Presentation.
Select the one-zone template for the resolution of your displays. See Creating a New Presentation, step 2 for more information on selecting templates.
Enter a name for your presentation using a similar naming convention as: "<Site prefix>-Black Screen-1280x720" and click Create Presentation.
Drag and drop the Image widget ![]() onto the zone of the presentation.
The Assign Image window appears.
onto the zone of the presentation.
The Assign Image window appears.
Locate and select the black screen in the list of available images.
Click Stretch To Fit and Save.
Click Save at the top of the Presentation page.
Now that the presentation with the black image has been created, it needs to be added to the schedule.
To schedule a black screen during off hours:
Click the Schedules tab and locate the existing schedule. Click Edit.
Locate the black screen presentation in the list of presentations on the right side.
Drag and drop the black screen presentation onto Monday on the timeline. The Configure Existing Event window appears.
In the Start and End times, enter 12:01 AM and 11:59 PM.
In the Recurrence settings, select Days and enter a "1."
In the Priority drop-down, select "9."
Click Add to Schedule.
Click Save at the top of the Schedule page.

