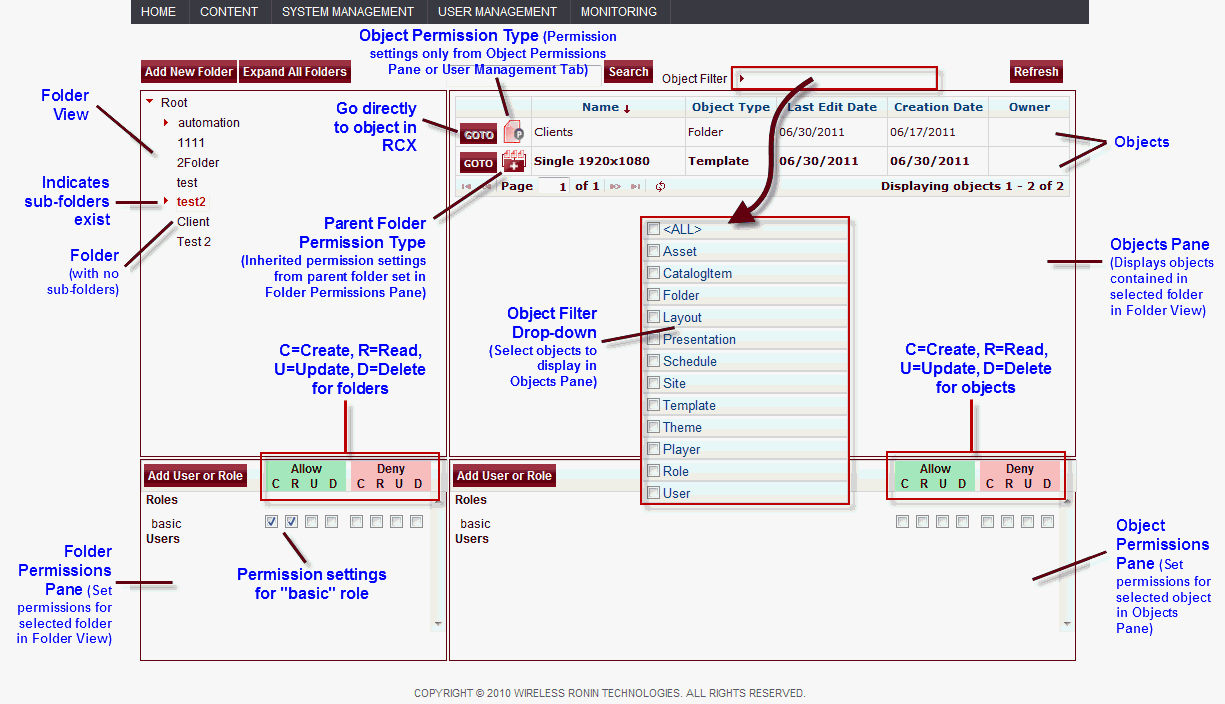
In Folder Management, located under the System Management tab, all objects in the RonincastX system can be organized in folders and sub-folders. Access permissions can be set on a folder and/or object level.
Understanding Folder Management User Interface
Hover your mouse over different areas to locate hot spots that will take you to more information.

The top left pane displays the entire tree structure
of folders as they are created and populated with objects. An arrow  will
precede the folder name if it contains a sub-folder or objects.
NOTE: Only the folders for which the user has permission to read or use will appear in the tree structure.
New folders can be created under the Root folder.
1. Select System Management/Folder Management tab.
2. Click Add New Folder.
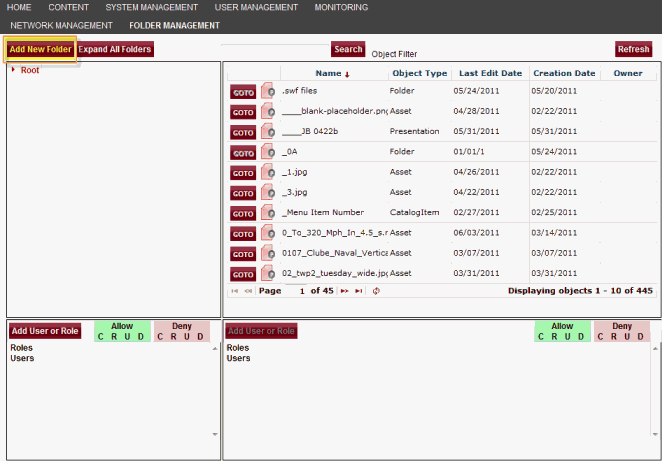
The Add Folder dialog appears.
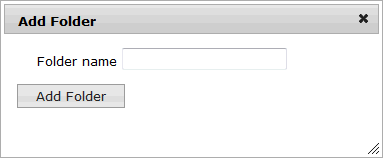
3. Enter the Folder name and click Add Folder. The folder appears in the folder tree structure.
Folders and sub-folders can be Deleted, Renamed, or Cut (to paste in another folder) by right-clicking the folder. A context menu appears. The Paste option appears when another folder, sub-folder, or object has been copied.
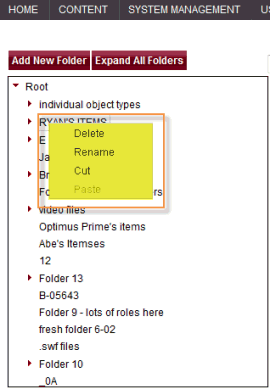
Folders and objects can be dragged and dropped to another folder. It does not leave a copy in its current location if you left-click and drag.
NOTE: Multiple items can be selected using the Ctrl key.
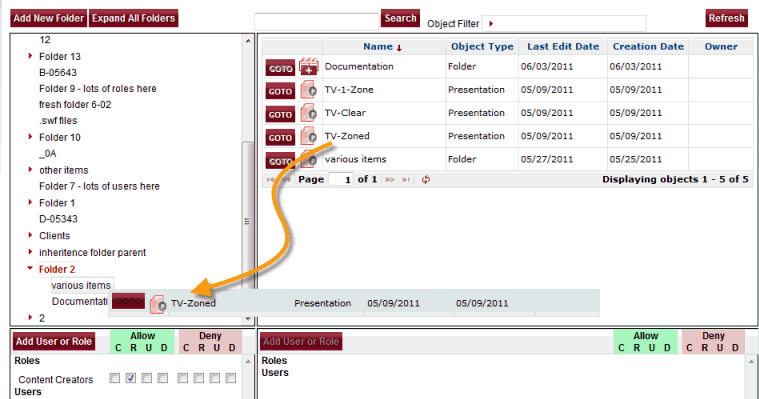
Objects can be moved or copied by right-clicking the object and dragging/dropping into a folder or sub-folder. The following window appears:
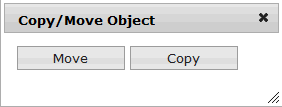
Clicking Copy leaves a copy of the object in the original location as well as in the target folder.
Clicking Move removes the object from its original location and moves it to the target folder.
NOTE: Multiple items can be selected using the Ctrl key.
NOTE: You must have access to all objects in a folder to move or copy a folder.
Click the Expand All Folders button to expand every level of sub-folders in the tree structure. Click Collapse All Folders to fold the tree structure up into the Root folder.
The Object pane contains all of the objects in the system, including folders, templates, images, layouts, catalog items, .swf files, schedules, presentations, themes, players, roles, users, sites, and other movie/video files.

Icon |
Description |
|
Object Permission Type--This icon indicates if the object has its own permissions set and did not inherit any from the folder in which it resides. These permission settings could have been set in the Object Permissions pane in Folder Management or in the User Management/Roles Access Control page.
|
|
Parent Folder Permission Type--This icon indicates if the object inherited its permission settings only from the Folder Permissions pane in Folder Management. An object with no permission settings in a folder that has no permission settings will have this icon because the object has inherited the parent folder's identity of no permissions set. An object that has inherited the parent folder's permission settings can be set back to Object Permission Type by removing the settings in the folder where it resides and clicking Refresh.
|
Enter a keyword or a part of a title and click Search. The results will be listed in the Objects pane.
The list of objects can be narrowed down using the Object Filter.
To narrow down the list using Object Filter:
1. Click
in the text box and the arrow  will expand the filter
list.

2. Select the object(s) to use as a filter and click outside the filter list. The list automatically refreshes.
NOTE: <ALL> is checked by default.
Objects can be dragged and dropped into folders.

Right-click and drag the object to move or copy into a folder. A dialog box appears to give you the options of moving the object and deleting it from its current location or making a copy and placing it in another folder.

Left-click and drag the object to make a copy of the object and place it in another location.
The GOTO button next to every object allows you to navigate directly to that object whether it be a player or a presentation. The only objects not accessible by the GOTO button are folders.
Folder Permissions Pane
Permissions can be set for Roles and Users at the folder level in the Folder Permissions pane.

Existing Users and Roles can be added to the Folder Permissions section.
1. Click Add User or Role.

2. Select "User" or "Role" from the Add drop-down list.
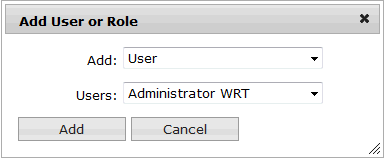
3. Select the user or role from the Users or Roles drop-down list.
4. Click Add.
The permission settings for the folder appear with Grant and Deny checkboxes. Under each heading is C R U D:

NOTE: C R U D: Grant “Create” Access, Grant “Read” Access, Grant “Update” Access, and Grant “Delete” Access to the folder.
1. Select the Grant and Deny access checkboxes appropriate for this user and the specific object.
NOTE: If both the Grant and Deny checkboxes are selected for the same task, Deny always trumps Grant.
2. Click OK.
Object Permissions Pane
Existing Users and Roles can be added to the Object Permissions section.
1. Click Add User or Role.

2. Select "User" or "Role" from the Add drop-down list.

3. Select the user or role from the Users or Roles drop-down list.
4. Click Add.
The permission settings for the object appear with Grant and Deny checkboxes. Under each heading is C R U D:

NOTE: C R U D: Grant “Create” Access, Grant “Read” Access, Grant “Update” Access, and Grant “Delete” Access to the object.
IMPORTANT: Access settings performed in Folder Management will automatically change what was set in the User Management tab Access Control and vice versa. The system recognizes the most recent access settings whether set in User Management tab or in the Object pane of Folder Management.
1. Select the Grant and Deny access checkboxes appropriate for this user and the specific object.
NOTE: If both the Grant and Deny checkboxes are selected for the same task, Deny always trumps Grant.
2. Click OK.